The Sachs 3×7 hub dates from the 90′s. It incorporates a seven speed freehub on a three speed planetary-geared hub. The result is 21 gears without the use of triple chain rings and front derailleur. When Sachs was purchased by SRAM in the early 2000′s, the hub was continued for several years before being replaced by the SRAM Dualdrive hub. The newer Dualdrive hub is a similar concept, but is entirely different inside.
Table Of Contents
Maintenance
Maintenance on the 3×7 hub isn’t very complicated. Every so often (I did it every couple of months), lay the bike (or wheel) on its side and remove the pull-chain/rod from the hub. Then drip a few drops of oil down the hole and let it settle in. Re-thread the pull-chain and go about your business.
The correct frequency of this lubrication is going to depend on what oil you use, and how frequently the hub is used.
Overhaul
After some use, the hub will want an overhaul. The purpose is to remove dirt and old lubrication, and inspect and replace any worn parts. This may be an annual event, or it may be as infrequent as once a decade.
Note: In the following discussion, any reference to left or right is with respect to the hub as it would be positioned on a normal, right-drive, two-wheeled, cycle. If it makes you feel better, you may substitute the words ‘drive side’ wherever you see the word ‘right’, and ‘non-drive side’ wherever you see the word ‘left’. The word-count will be higher, but the meaning will be unchanged.
Tools
Overhauling the 3×7 is something any decent mechanic can handle. It requires only a few tools and attention to detail. The required tools are:
- 9mm wrench
- 15mm wrench
- 17mm wrench
- 15mm cone wrench
- Snap ring pliers
- Small screwdriver
- Cassette lockring tool
- Chain whip

A stick magnet to catch the bearing balls is also be nice to have. You will need both oil and grease for lubrication during reassembly.
External Parts
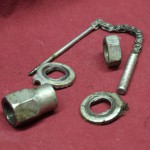
Start by removing pull-chain/rod from the wheel. One end will unclip from the black quick-release on the cable. The other end is threaded into the hub. Just straighten the chain out, and unscrew the rod from the hub. 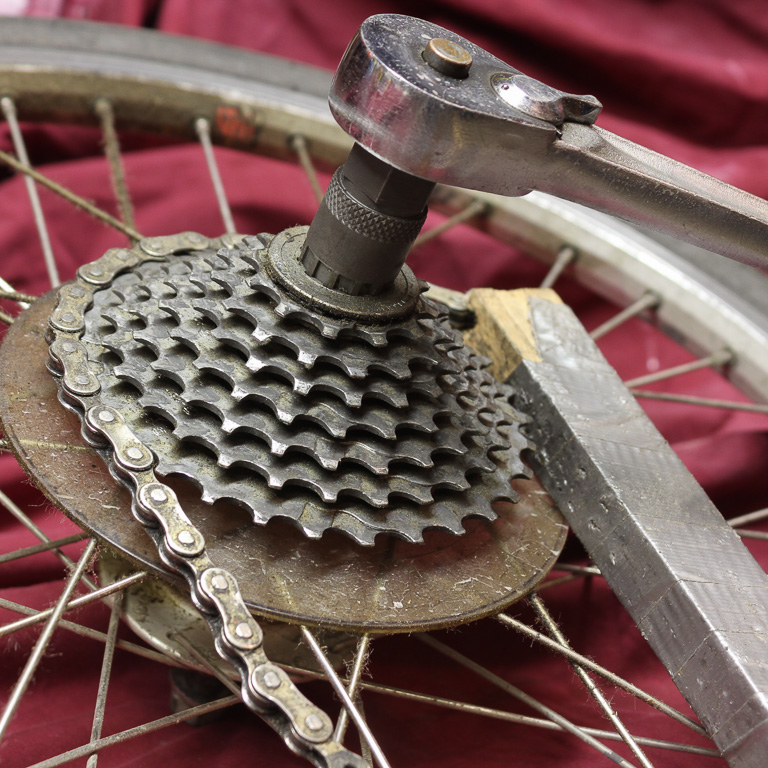 The chain can be clipped back into the cable quick release on the bike for safe keeping. Now you can remove the wheel from the frame. The axle nuts are 15mm and are not metric threads. Do not misplace these nuts! Remove the nuts and anti-torque washers from the axle and set them aside.
 Use your cassette tool and chain whip to remove the cassette from the freehub. The lockring is reverse threaded, so be sure you are turning it the correct direction. It should not be hard to turn. Hint: if you aren’t having to hold the cassette with the whip, you are turning the lockring the wrong way.
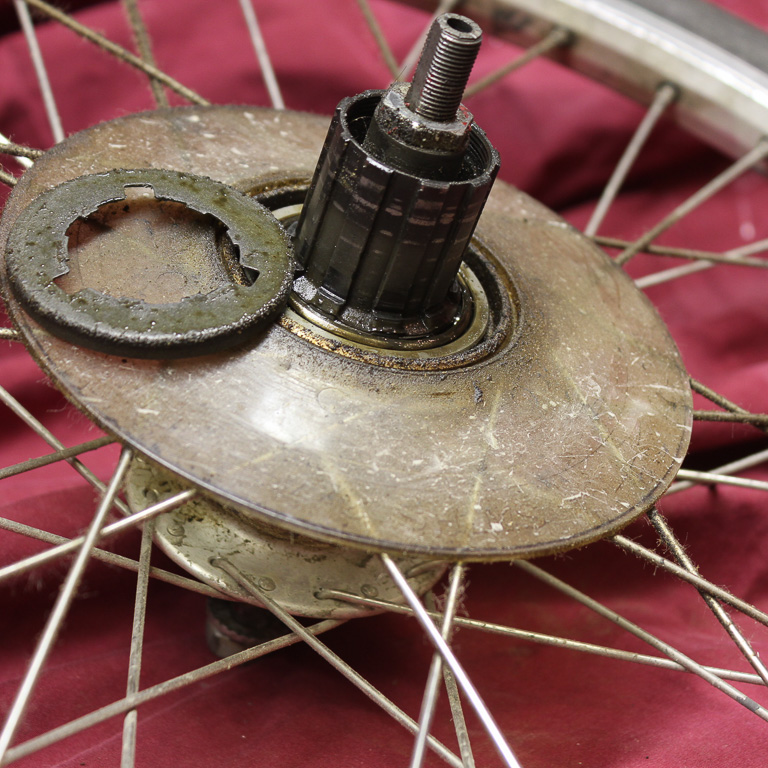
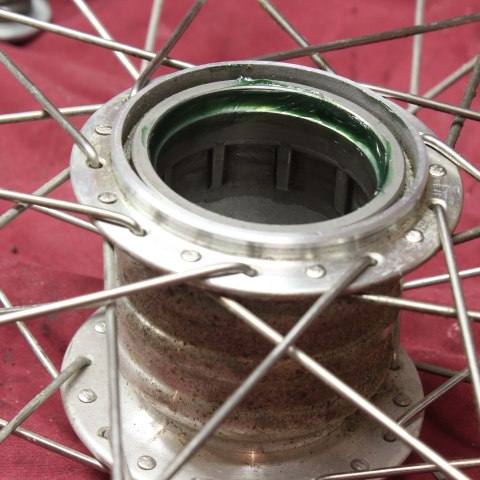
Set the cassette aside and remove the dust shield from the hub body. This is not a ‘sealed bearing’ hub in the 2010 sense of the term. You will be able to see the edges of the wheel bearings under the dust cap.
Remove the Core
 If you haven’t already removed the axle nuts and anti-rotation washers, do so now. Then, turn the wheel over and remove the left-side lock nut and bearing cone. Depending on the vintage and history of your hub, the bearings may be caged or loose. If they are loose, they are trapped between the axle and the dustcap until you lower the axle out of the way.
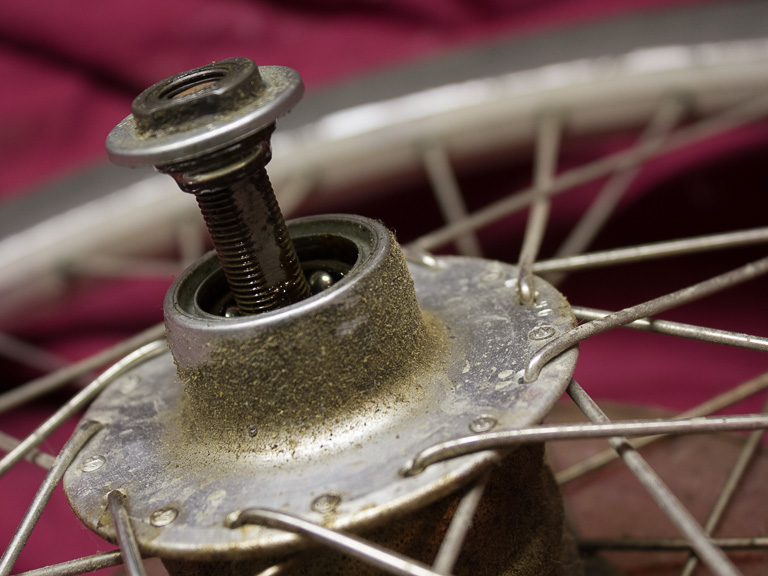 For the remainder of this page, we will assume the bearings are loose.
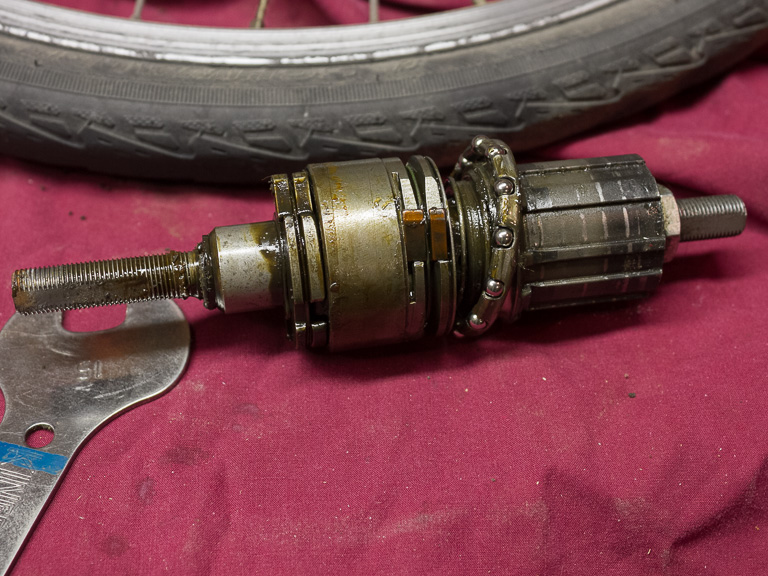
When you are ready to chase the bearing balls around the bench, lower the core from the hub and grab the bearing balls with your magnet. All of the 3-speed guts will come out in a single piece. The hub should now be empty of moving parts. Clean it as you would any other large lump of machined aluminum.
Disassemble the Core
 The planetary assembly is at the left end of the core. It is held on the axle by a circlip. Use your screwdriver to lift the circlip out. It will want to fly across the room and you shouldn’t let it. The planetary assembly will slide off the left end of axle in one piece.
Use a 9mm wrench to hold the axle and the 15mm wrench to remove the right 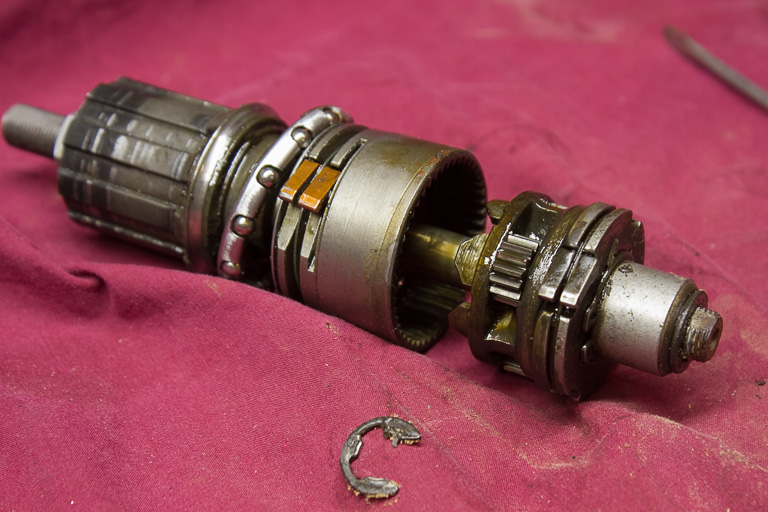 locknut. With the nut removed, the long bearing cone and a spring with a cap can be slid off the right end of the axle. The freehub body, a large spring, and a caged bearing set can then also be slid off the axle. There is another set of bearing balls inside the freehub body. They may be free or caged. You should assume they are free. As the freehub body clears the axle, be careful that the loose bearings in it don’t escape across the bench. Grab them with a magnet and put them somewhere safe.
Pay attention as you take off these parts because the details matter when it comes time to reassemble them. Putting the caged bearing in backwards, or the spring cap on the wrong end of the spring, will cause significant problems later. If this is your first time in the hub, lay the parts out (in order) on your bench and only move one at a time. It will improve the likelihood of a successful reassembly.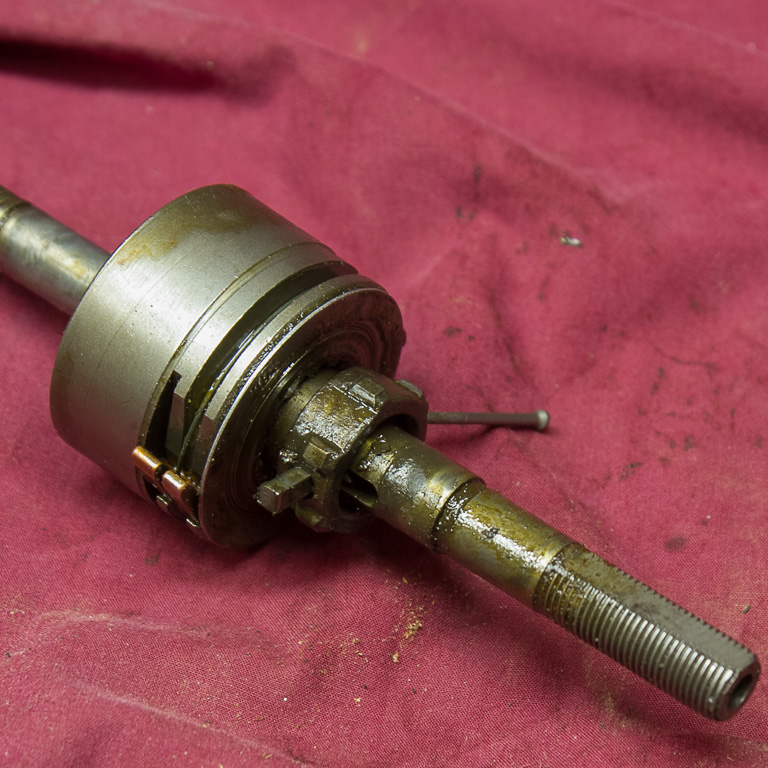
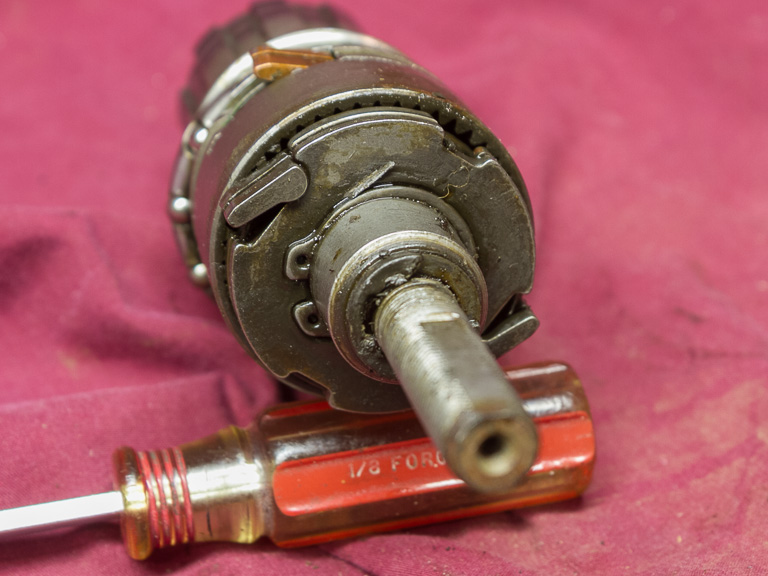
The central driver is the last part remaining on the axle. It is held on the axle by a small sliding key fitted through a slot in the axle. The pull chain (removed in step one) threads into the center of this key. Rotate the splined driver until the slot in the axle aligns with the large hole in the side of the splined driver. Depending on the condition of your hub, the small key in the enter of the axle may now be tipped, tapped, or driven out through that hole.
Pay attention to shape and orientation of that key. It is not rectangular in cross section and its orientation matters. The curved surface is positioned towards the center of axle. The square surface is positioned towards the right end of the axle.
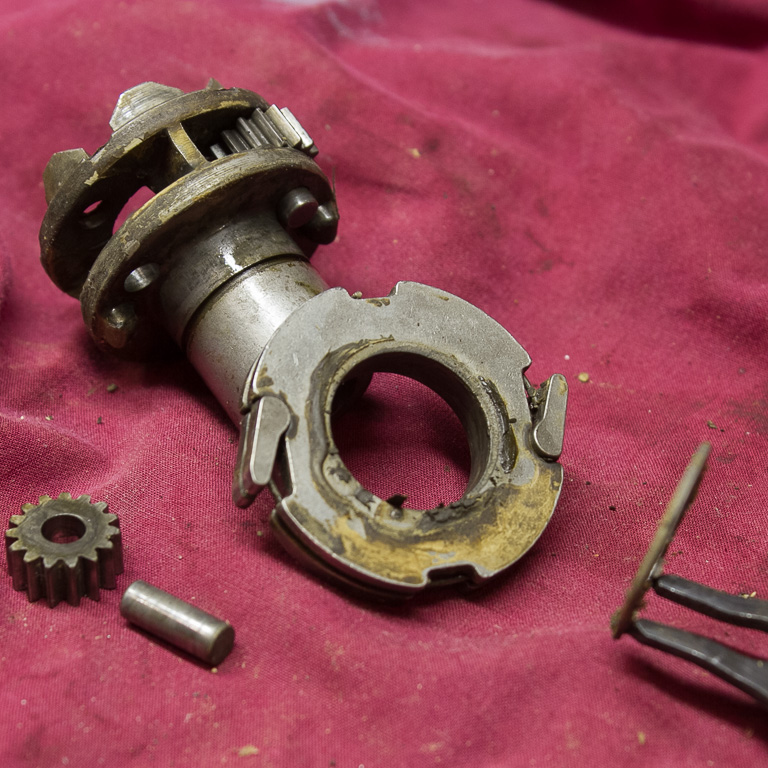 Finally, the planetary assembly (taken earlier off the left side of the axle) can be disassembled. Snapring pliers will let you do this job without fear of stretching or kinking the ring. I’m sure they cost less than the replacement cost of snapring, so reduce your stress level and buy a pair. Carefully remove the snap ring (and the washer under it) from the body and slide off the disk with the pawls. With the disk off, the three axle pins for the planetary gears can be removed. Depending on the condition of your hub, they may required a little persuasion. With the gears removed, a single washer from the center of the cage can be removed. Don’t let it fall out and be lost. The washer found under the snapring is not interchangeable with washer found trapped below the three gears.
Clean the Core
If you have an ultrasonic cleaner, I suggest dunking it all. Otherwise, get a wire brush and some solvent and get to work. Some things worth noting:
- There are two different pairs of ratcheting pawls, and the pawls are asymmetrical. If you remove them or their springs, keep straight where they came from and which way they pivot. You don’t need to remove them to clean them. There is enough movement in the spring to let you get under them.
- The dustcap inside the freehub body is almost impossible to remove without a cap puller. If you do pull it, it won’t be easy to replace it at precisely the correct depth. You are probably better off cleaning around it. If you have caged bearings, you will probably have to remove it to clean them. In this case, tip the freehub body upside-down on the bench and press firmly on the dustcap from behind.
- The outer rim of the inner edge of the freehub body is a bearing cone. Clean it and inspect it for damage and wear.
Clean the Hub
- The left hand bearing race is on the hub. Its dust cap isn’t too hard to remove or replace. It can be pulled with gentle screwdriver prying. It can be replaced with a gentle tap with a block of wood.
- The race for the right-hand caged bearing is also on the hub. Clean this carefully and inspect it for damage and wear.
- The ratcheting drive-pawls engage on the inside surface of the hub. Clean these surfaces.
Reassemble the Core
Two different lubricants are needed, grease and oil. The three sets of ball bearing run in grease, everything else depends on oil. I recommend Phil Wood’s Waterproof Grease and Tenacious Oil. Start by reassembling and lubricating the core. Assembly is just the reverse of the previously documented disassembly. Any interface in the core which slides or rotates should be oiled.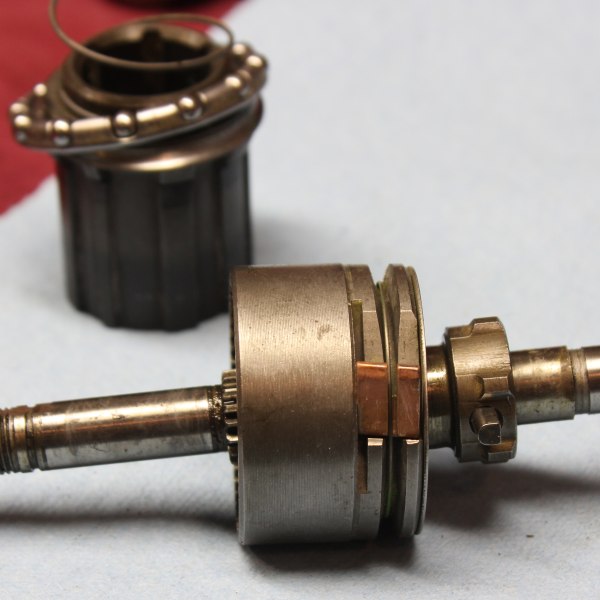
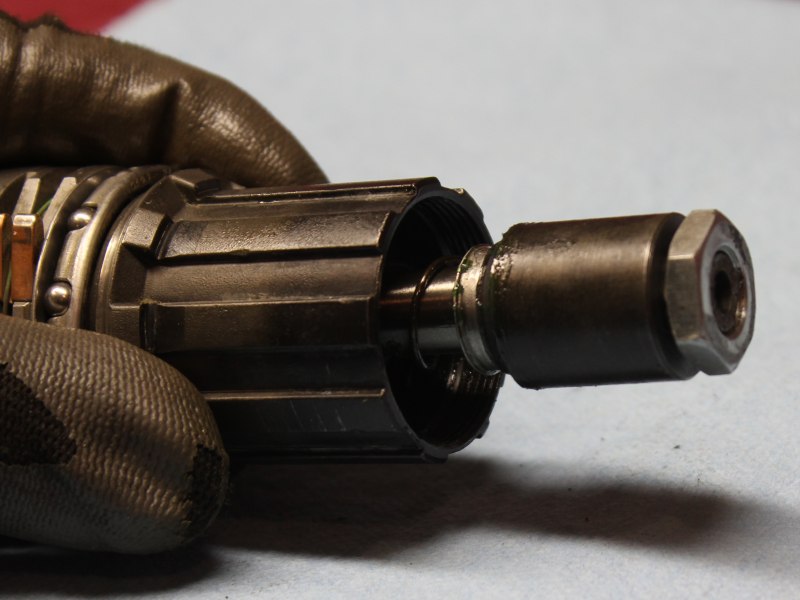
Slide the central driver back onto the axle and slip the key back through the hole into the slot in the axle. The curved surface of the key goes towards the center of the axle. The square surface of the key goes towards the right end of the axle. Check the photograph and confirm you have the key the right way around. Again, every surface which slides or rotates should be oiled. This includes the parts which rotate directly on the axle.
Drop the small-diameter spring over the right side of the axle and into the key. It will rest on the top/right (square) surface of the key. Fit the cap over the spring. The right hand bearing cone will eventually rest against this cap.
Insert grease and balls in the bearing race inside the freehub body. If you removed the dustcap, reinstall it now. It needs to be close, but not touching the bearings. Mount the large spring on the end of the freehub body. There will be enough friction to hold it in place. Drop the caged bearing over the axle and onto the central driver. It won’t sit anywhere in particular, it just needs to be there. Then slide the springed freehub over the axle. Slide the long right-side bearing cone onto the axle and inside the freehub body, and thread the lock nut on.

Hold the axle flats with a 9mm wrench and snug the lock nut with a 17mm wrench. The lock nut tightens the long cone against the axle. There is no jam nut. All bearing adjustments will be made later from the left side of the hub.
 Reassemble the planetary assembly. Put the thrust washer in the center before installing the three planetary gears. It is not possible to assemble it in the opposite order. The washer is visible in the accompanying photograph. Put the pawl-ring on the other end to hold the axle pins in place. Because of the drive pins/dimples, it will only fit in one direction.
  Reinstall the snap ring and confirm it is fully engaged in its groove.
Slide the planetary assembly onto the left end of the axle. Rotate it until the three planetary gears engage with the axle-mounted sun gear and it is fully seated. Slide the washer onto to the axle. The axle flats are longer on one side than the other. If the washer will not seat against the end of the planetary assembly, spin it the washer 180-degrees and try again. When the washer is snug, reinstall the snapring.  Remember to oil every sliding or rotating interface.
Check the bench to confirm there are no leftover parts. Add a drop of oil under each of the four ratchet pawls and confirm they pivot smoothly. At this point, the core is again complete.
The next steps may be easier if the axle is mounted vertically (left-side down) in a vise. If you do so, be sure to grip the flat portion of the axle to prevent damage to the threads.
 Grease the large right hand bearing cup on the hub. Grease the left-hand bearing cup and install the bearings and dustcap. Lower the core into the hub. Take care that the axle does not knock out any of the left hand bearing balls. Confirm the large caged bearing seats cleanly between the race (on the hub) and the cone (on the freehub body). Install the left-hand bearing cone and lock nut. Adjust the bearing preload using only the left-hand cone and lock nut. It is not possible to adjust bearing preload from right side of the hub. Attempting to do so will not do what you expect and will result in bearing failure.
When you reinstall the wheel in the frame, you must use the keyed anti-rotation washers and they must be engaged in the dropouts. Failure to do so will cause the hub to rotate in the dropouts during use.
Testing
To bench-test the hub, remove the left-hand axle nut and anti-rotation washer. Clamp the axle-flat in a vise and thread the pullchain into the hub.
High Gear
With no tension on the indicator chain, rotate the cluster or freehub body. The wheel should begin to spin. As you rotate the cluster, look down on the wheel from above and pay attention to a spoke pair near the cluster. As you ‘pedal’, the wheel should rotate faster than the cluster. The spoke pair you have focused on will advance past teeth on the cluster or grooves on the freehub body.
Low Gear
With the chain pulled almost completely taught, perform the same process. The wheel should rotate more slowly than the cluster. The spoke pair you focus on will fall behind teeth on the cluster or freehub body as you ‘pedal’.
Direct Drive
Finally, relax the chain until you feel the hub slip into 2nd gear. In this position, the wheel and the cluster should keep pace and rotate in time with each other. The spoke pair you focus on should move at the same rate as the cluster or freehub body.